Is My Boxwood Dead?

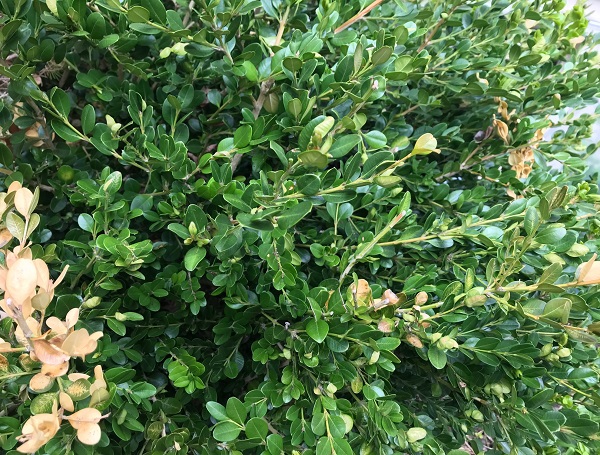
Is my boxwood dead or does it just look like it? Well, that depends. In Chicagoland, we had a rough winter. That polar vortex descended rapidly, froze the ground, stayed for way too long, and leafy evergreens paid a price. Perhaps your boxwood looks like this:
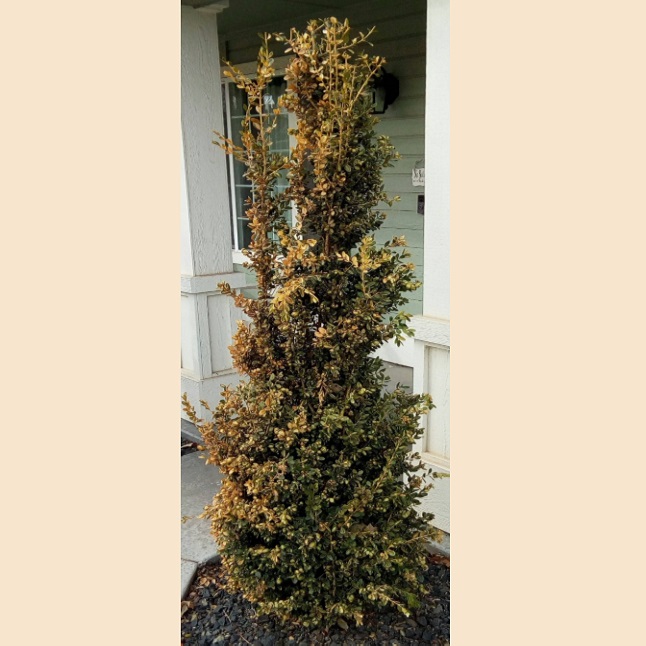
Or this:

Or even this.

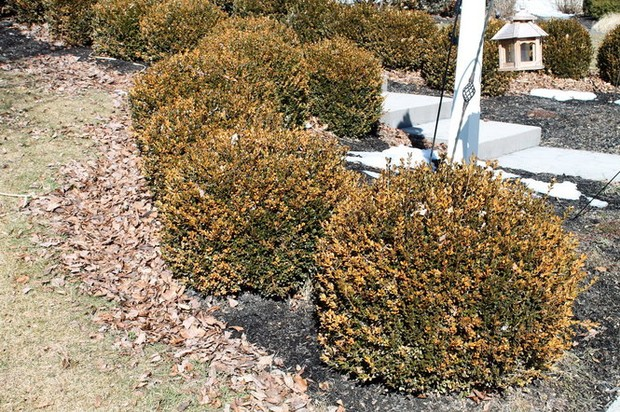
Tell-tale symptoms of (1) brown outer branches with green interior, (2) ground-level green but top-level brown, or (3) only brown on the south to west to north “hemisphere” of growth indicates it’s probably winterburn.

What exactly is winterburn?

It’s a condition in which the leaves have desiccated (dried out) due to the leafy portion still transpiring (exhaling) moisture but the ground is frozen preventing water uptake. Add to that howling windy conditions and brutally cold sunny days, and it’s a perfect recipe for all the transpiring with no ability to replace the moisture from a frozen root zone. Basically, it’s like freeze-drying, and boxwoods are particularly susceptible to it because their leaf structure.

So, what do I do? If your boxwood was only marginally hardy (and different varieties have different hardiness levels), it may be dead because our winter was extreme. A quick way to tell is to scratch through the bark of a stem to see if there is green underneath indicating it’s still alive.

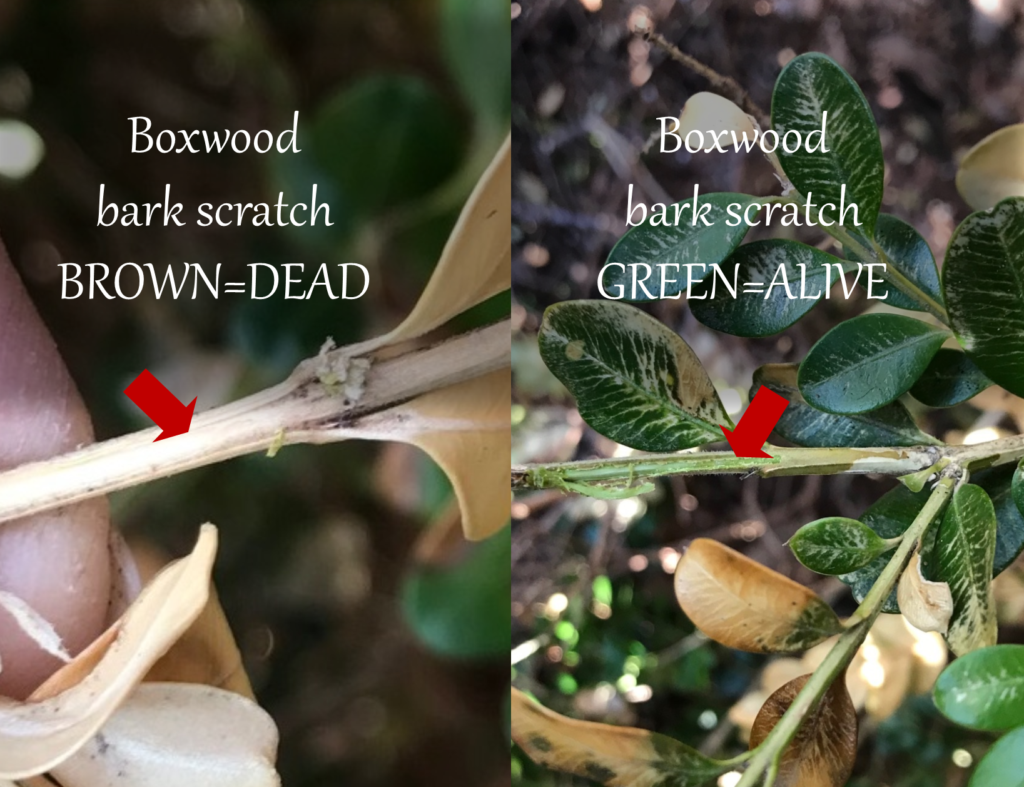
If your boxwood is only marginally brown, still alive and could withstand a bit of pruning, make your cut just above a green leaf. If your boxwood has a whole chunk affected or a whole top, give it a while if the scratch test proved green. You will be amazed at the resiliency of plants as their brown leaves get pushed off by emerging green buds. Even into June this can happen, particularly if you’re having a cold, cloudy spring as we have had in Chicagoland.

Be sure to keep the root zone moist (but not wet) as that will help with emerging leaves. A balanced fertilizer or one designed for trees and shrubs is also helpful as your boxwood tries to recover. If your boxwood is dead, no amount of moisture or fertilizer will bring it back from the dead. One last reason for browning is disease, but that’s far less common than winterburn.

With a little detective work, you can figure out if your boxwood is actually dead or just a little winter weary as are the rest of us. For more information, check out the Chicago Botanic Garden’s website: https://www.chicagobotanic.org/plantinfo/winterburn

Continue Reading

Agricultural Imagery and Analogy in the Bible

God loves a good garden.  God loves farming. 

And God loves using horticultural and agricultural imagery and analogy. 

From the very beginning of the Bible (Genesis) to the final chapter of Revelation, there are gardens and agricultural imagery which God uses to teach us about Himself and about the world in which we live. 

Mankind began as caretakers of the perfect world called Eden from which we were expelled on account of sin.  Now we take care of an imperfect world by the sweat of our brow.  But someday, we will experience a new and perfect world which we sometimes call Heaven, but is really a New Heaven and a New Earth (Revelation 21:1-5). 

We’re going to be living on the New Earth after Jesus returns.  None of this floating on clouds playing harps nonsense and having to earn our wings like Clarence helping George Bailey

There will be productive and enjoyable work to do which makes some of us cringe at the thought of working for eternity.  But work won’t seem like work does here.  I’ve gotta believe at least some of it will be agricultural with all the blessing and joy and none of the disease and drought and risk of losing the farm.

Food for thought:

What words would you use to describe work?  What makes work hard outside of Eden? Would you welcome or despise agricultural work? 

Continue Reading

Happy Gardening New Year!

Wishing all my gardening and theology friends a Happy New Year!  Isn’t it amazing how many flowers look like fireworks?  I was thinking about that this morning as I was watching the westward setting of the biggest, most beautiful full moon I can ever remember on a New Year’s Day.  Looking eastward over Lake Michigan with the air so cold that lake-effect clouds hug the coastline, I watched as the sun bravely rose into an otherwise clear sky.  A frigid January 1, 2018.  But beauty everywhere!

As I do every year, my New Year’s begins by thanking God for all this beauty and reflecting on last year’s garden and last year’s living.  I am reminded that every year it’s the same thing: my garden had show-stoppers and total flops.  Just like my life in 2017.

But it’s a New Year and while it’s really just a calendar turn, it does mean planning for this year’s show-stoppers and knowing I’ll also have my share of flops. 

New Year’s self-improvement resolutions aren’t my thing anymore because I know the disappointment of planning for show-stoppers, but living in the real world where there are flops I try to avoid and those beyond my control.  Rain.  Drought.  Heat.  Cold.  It’s life outside of Eden.

My main resolutions, therefore, are positive and my hope of a beautiful garden of fruit for God’s glory includes sowing these things:  

  • Resolving to be faithful and pray before speaking. 
  • Resolving to forgive readily. 
  • Resolving to be brave when boldness is needed. 
  • Resolving to be patient when patience is required.
  • Resolving to thank God for so many wonderful blessings and the beauty of this earth. 
  • Resolving to be found hard at work when Jesus returns.

What about you?  If your life is a garden, what will you plant this year?  


Continue Reading

10 Steps to Edging Your Beds BETTER than a PRO

Here you go: How to edge your bed better than a pro in 10 easy steps.  “Pretty arrogant,” you might say!  Q:  What makes you think you do it better than a pro?  A:  Because I hate edging and I don’t want to do it more than once a season.  Pros don’t mind coming back every few weeks to redo edging as repeat $ales.  I do.

There are few jobs in the garden I hate more than edging flower beds.  The only thing worse is letting my husband edge it and I pay the price with mowing the rest of the season.  He helps a lot, does a good job and means well … but … I think he’s of the opinion that…

a man isn’t a man if he doesn’t dig deep manly trenches that require rappelling equipment to navigate. 

Don’t get me wrong: they’re crisp and beautiful and look like the White Cliffs of Dover, except they’re the Brown Cliffs of Shafer.  But using a lawn mower anywhere in the vicinity means scalping or fringe with nothing in between for the rest of the season.  So, I must beat him to the edge and make sure it looks so good, he doesn’t feel obligated to do something manly with landscaping tools when he can do equally manly jobs (LOL like taking out the garbage instead, wink, wink).

Tools you will need for your expert edging:

  • rake,
  • edging tool,
  • trowel,
  • a large container/ yard waste bag/ or tarp for debris,
  • hand clipper/grass shears, and
  • Round-up Extended Control (or other long lasting vegetation killer).
How to Edge Better than a Pro in 10 easy steps:
  1. The ground must be dry enough to permit an edge without becoming slimy mush … but moist enough that it doesn’t seem like concrete or disintegrate into a dust pile.
  2. The edging tool must be sharp.  I have used both a”half-moon” edger and straight edge shovel.  Both are good provided they’re sharp.  If they aren’t sharp, then a YouTube video and a metal file will do the trick.
  3. Using the rake, pull any residual mulch away from the area where your edge will be.
  4. Place edging tool at the edge location you want and step straight down to cut the edge.  Don’t rock forward and back or it will destroy the crispness.  If you need to rock it to get the tool out, side to side keeps the edge nice.
  5. Do a section long enough to end at a good stopping point.  In other words, not a foot at a time.  I usually do 6-8 feet where a plant or stepping stones make a logical stop point.
  6. Using the trowel, go back and dig the trench 3 inches deep to remove the parts being edged out.  Three inches is deep enough to get most of the grass roots but not so deep that mulch won’t fill it in later.
  7. Recycle yard waste being collected to container, tarp, or yard waste bag.
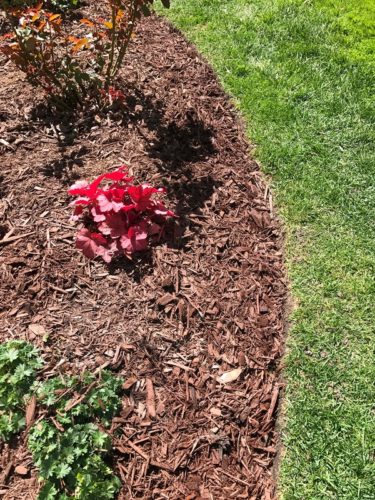
  8. Repeat until the full edge is complete and then use the grass clippers to shear the very edge to a scalping level.  While a weed whacker could do it, the result will be less precise.
  9. Take the Round-up Extended control and spray ONLY the base and lowest wall portion of the trench.  Don’t get it on the grass or it will kill it.
  10. After the Round-up has dried, replace mulch to within 1″ of grass level, and if desired (and I do) spray another 4-6″ barrier band of Round-up on top of the mulch to keep grass and groundcover from mingling, and you’re done!

* * *

It has been my experience that this edging method–while initially hard work– lasts for a whole season keeping grass out of my flower beds and groundcover out of my grass.  Better yet, it works so well as a barrier that the next year edging is a breeze! Plus, working hard at something that lasts is biblical:

Colossians 3:23 Whatever you do, work at it with all your heart, as working for the Lord, not for men.

Continue Reading

Seasonal Birding in Illinois Gardens

Time for a few gardening posts (yes, birding is an extension of gardening). This has been on my mind for a while now.  Given that we’re 16 degrees below normal temperature-wise and the steady rain has made the soil unworkable, I don’t want to be in the yard.  Writing about it is almost as good.  Sort of…

I wonder if the cold spell we’re under explains why the goldfinches are changing color and the snowbirds are now gone, but the hummingbirds, orioles, indigo buntings, rose-breasted grosbeaks, and other migratory birds are not here yet.  Bird brains? I think not.

Hummingbirds migrate individually, not in big flocks.  These loners have an internal clock, and tiny as they are, a few fat reserves which help to carry them between natural food sources as they migrate 2000 to nearly 3000 miles from southern Mexico and northern Panama into the (godforsaken) Midwest.  This year someone in West Dundee reported that they already saw one.  (mutters, “Braggart, overachiever!”).  I’m still waiting.  Maybe it’s cooler near the Lake (Michigan).

Suicide Prevention: On a normal year (which is Illinois EVER normal??) I deploy my “migratory bird suicide prevention” mechanisms (clings and screens ) on the large plate glass windows and sliding doors by the second week of April (when migration typically begins in earnest).  The reflection of the outside trees and landscape makes birds think that nature continues as pictured in the glass and they blithely smash into windows and doors… and die.  And of course, it’s never a bird that I really don’t like very much.  It’s usually one I love seeing as a person who enjoys birding.

For sliding doors, I use a combination of the screen doors to block one side and a piece of shiny curling ribbon taped to the glass on the side without the screen.  On the front bay window, I have clings proudly stating “USA!” in red, white, and blue stars since I couldn’t find anything else that didn’t look profoundly juvenile or way too seasonal.  The clings stick to the shady north window and the reason I don’t use them on the south side is that I don’t want them to melt or become gooey in the hot sun and then smear as I open and close the screen.  Both clings and curling ribbon interrupt the visual flow of outdoors reflected and tell birds, “Steer clear!”

And then there are the feeding changes for seasonal birding. 

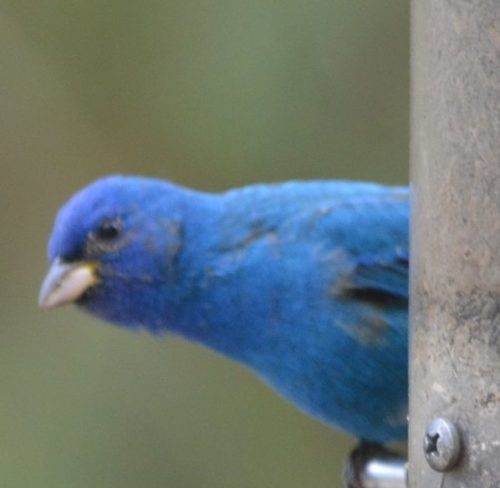
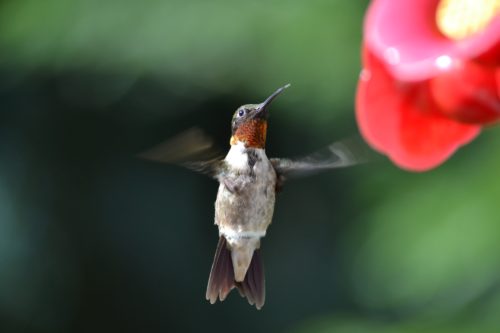
Nectar feeders: To greet their arrival, I put out the oriole and hummingbird feeders with a room temperature sugar-water mixture (1 cup granulated sugar to 4 cups hot water for ease of dissolving).  I never use soap in those feeders since the residual taste causes rejection.  Before changing the food, I will use water and a few drops of bleach to kill the mold and mildew which would otherwise proliferate.  Rinse well and replace the food.

Bird eaters:  And the other change I make is to put whole peanuts (in the shell) in an open tray along with sunflower seed to give the blue jays something to eat without picking baby birds or eggs out of nests to eat.  It appeals to how they’re wired to eat, but fills them up without requiring baby birds to do it. 

Feeder positions:  Knowing that my back yard will attract birds that eat migratory birds as their food of choice, I position my feeders to prohibit a speedy flight path from tree to innocent little bird.  The Cooper’s Hawk must think I created a banquet just for him, but I will defend my little ones with my big arms flapping and a fully loaded super-soaker.  Crows?  Same deal.

I love seeing the migratory birds and want their stay in my yard to be as pleasant as possible.  If our growing season actually begins this year, there will be plenty of natural food for all my bird friends to enjoy so I can enjoy seeing all my bird friends!

There is a time for everything, and a season for every activity under heaven (Ecclesiastes 3:1)


Continue Reading

Garden Tour for Charity 2016

What follows is the text of the self-guided garden tour from my March-to-November garden in last week’s charity garden walk.

A number of people asked if I could post it for the plant names.

house front
Welcome to my garden! Ready to take a walking tour?
  1. Mailbox.  house numbers
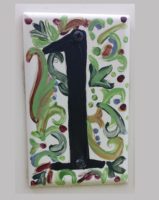
Part of every garden is the first impression. I hand-painted the house numbers on switch plate covers ever since the mailbox bashing game of a few years ago left many of our mailboxes face down in the street. I figured it was at least possible that I could pattern any new ones required off of the old ones. Much of my garden is what I call the “Out of Eden” experience in which I’m dealing with things in a chronic state of imperfection and finding solutions to problems.
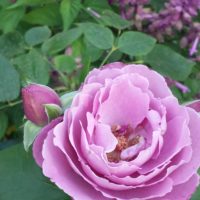
 The daylilies are ‘Happy Returns’ and ‘Stella d’Oro’ (both of which will repeat bloom throughout the season provided I remove the seed pods and fertilize them). Usually, I remove flowers of lamb’s ear but they look rather pretty out here this year.
  2. Walkway to front. The ‘Double Delight’ tree rose is new this year and replaces the shorter one I had for nearly a decade before the voles (mice) devoured it down to what looked like a sharpened pencil. The heirloom garden walkHeirloom’ (hybrid tea, left) and ‘Pinata’ (climbing) roses both made a comeback from growing in pots last summer and overwintering in the garage.
    1. Also in the front was a stunning group of daffodils which you’ll notice the foliage is still dying back. Decline is a part of the perennial garden which I view as a sequence of fireworks—some new ones come on as others are fading. Daffodil foliage dies back naturally and it produces food for next year’s flowers as it does. But it’s ugly, so pots of annual flowers fill in the blank spot this year that used to be a full display of Black-eyed Susans to hide the dying daffodils. It’s a blank spot because of last year’s black spot (a fungus that thrives in moist conditions with no airflow). I hesitate to treat plants with fungicides when they are a food source for birds, so I have changed the watering from overhead spray to soaker hoses to resolve that disease issue. Even so, the profile of this garden ebbs and flows with the way life goes. Some years, I’ll have more Coneflowers; some years, it’s Black-eyed Susans; and one year, it was mainly Cardinal flower. But this year, they’re all making a march for the sidewalk and I’ll readjust everything this fall (a preferred time for dividing and transplanting).                 ============================================================================       * My garden demonstrates the truth of Romans 8: 19 “The creation waits in eager expectation for the sons of God to be revealed. 20 For the creation was subjected to frustration, not by its own choice, but by the will of the one who subjected it, in hope 21 that the creation itself will be liberated from its bondage to decay and brought into the glorious freedom of the children of God. 22 We know that the whole creation has been groaning as in the pains of childbirth right up to the present time.”                                                                             ============================================================================       *  Yes, because of man, death comes to the plants of the garden too…outside of Eden.  No plant lives forever even if creeping Charlie, garlic mustard, and dandelions make you think they do.  But while the garden flowers we love grow and thrive, they bring beauty and food to the rest of nature. Variegated Solomon seal and daffodils are the front yard’s joy of spring. Daylilies, Butterfly Weed (Asclepias tuberosa), Coneflower (Echinacea), Black-eyed Susan (Rudbeckia), and Cardinal flower (Lobelia cardinalis) are the summer’s splendor and the latter four feed both birds and butterflies. Matthew 6:26 “Look at the birds of the air; they do not sow or reap or store away in barns, and yet your heavenly Father feeds them. Are you not much more valuable than they?” When I’m troubled, that’s a Scripture I bring to mind and remember how valuable each person is to our heavenly Father. You are valued and loved by God. Isn’t that a great reassurance against worry? In the fall, the seeds of Coneflower and Black-eyed Susan are a good food source for goldfinches, but the dark seed heads are joined by the lovely white Japanese Anemones which soar to a height of 5 feet and make for an unusual black and white garden.
  3. Front porch. Ecclesiastes 3:1 “To everything there is a season, A time for every purpose under heaven.” Some plants are late leafers and bloomers. callicarpa
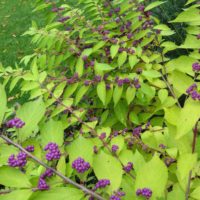
Such is case of the fall beauty called Callicarpa with its lovely magenta berries. It’s under the flag and looks like nothing now, but next month, the little magenta colored flowers will begin to hint that these stunning berries are on their way. The Boston ferns have been part of my family since 1998 and come indoors for the winter or on cold nights. This year, the one in the corner by the garage almost made it inside when I was surprised by a dove flying away as I got ready to bring it in, revealing 3doveinmyfern.jpg 
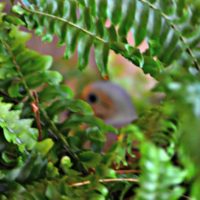
little baby doves, newly hatched in a “nest”. So my fern had to stay outside on a few frosty nights because that mourning dove had decided to make my fern her nesting place. She didn’t actually build a nest. She just smashed down some of the fronds of the fern which was just making a comeback from the winter of its discontent. The hanging baskets are actually 4 window boxes in pairs back-to-back. There’s a tutorial on my blog describing how to make them. Take a sticker from the sticker page to visit the tutorial and see how I turn houseplants and some annuals into beautiful hanging baskets.
  4. Roseanne Roseannadanna North Face. The north side’s Roseanne Roseannadanna Award Winner (RRAW) of “It’s Always Somethin’” would be the Coneflowers and Coleus, normally a really pretty display that has become the dinner of choice among discriminating bunnies, that is, when they’re not eating the petunias and hollyhocks on the east side.
  5. Upper East Side. The east side’s RRAW deal was the Japanese maple. Look up and admire its foliage shape and color. It almost didn’t happen this year. The leaf buds that made it through the winter’s ice storm were frosted off by a cold snap. We worried it was dead, but I fertilized and watered and sprayed water on the branches to encourage the adventitious leaf buds to break. 20160529_142914
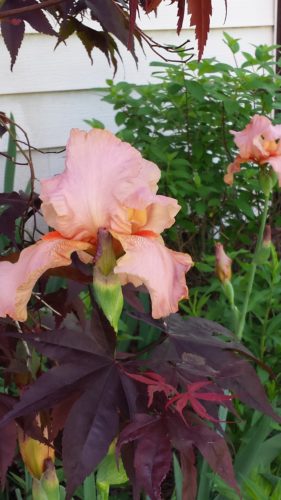
Plants are amazing! They have the ability to produce new buds or sometimes even roots along stems where no buds existed before, hence the big word adventitious. The Japanese maple is not quite the leafy glory of an average year, but trust me, it’s much better than it had been at the start of the season when we thought it was dead. It’s Always Something. On the Lower East Side is the potted geranium pillar that had been overwintered in the basement. It’s hard to believe it started as a 6-in pot 2 years ago. I’m training it in the way it should go so when it’s older, it will not depart from it. The Japanese Tree Peony tree peony.jpg(right) was a going-away gift from a friend of mine who wanted a home for her treasure when she moved. I also have Todd’s Iris from a friend named Todd (amazingly enough) from our time living in Minnesota. He mailed his special iris breeding efforts to us when we first moved into this house as a housewarming gift. I originally thought these were brown until the buds opened up to reveal this lovely shell pink. Take time to notice the colors of the foliage on this side of the house. gardenbirch.jpg
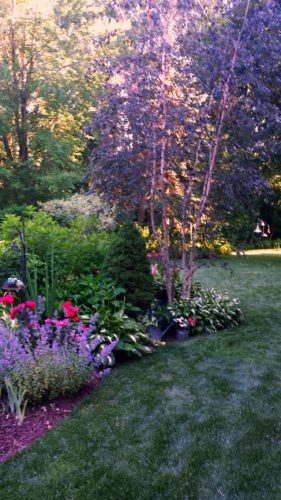
Gardens don’t have to have flowers to have color. All creation is amazing because our Creator is amazing.
  1. Love Grows Here. This part of my garden originally contained two pretty, but really messy, crabapples that left huge rotting fruit all over the side yard. Worse, the rotting fruit was good at attracting yellow jackets and deer which left behind far more than just trampled fruit. I cut the trees down myself and had a beautiful ‘Royal Frost’ birch planted here instead. From the front yard, the birch visually invites people to visit my back yard (which this year you can actually do!) and to see what hides around the corner. There are ‘Limelight’ hydrangeas, Hostas, Astilbe –all of which are visible now—but the shooting stars were part of its spring glory. Love is beautiful and colorful and this garden interprets 1 Corinthians 13:13 A”nd now these three remain: faith, hope and love. But the greatest of these is love.”
  2. The Perennial Border. This part of my garden features shrubs and trees as part of the March-to-November beauty. ‘Summer Snowflake’ Viburnum, Lilac, Hakuro-nishiki dappled willow, curly willow and pussy willow (I keep the latter two only to cut them down for container arrangements), and the serviceberry provide seasonal interest whether flowers, foliage, form, or fall color. The bird bath features a solar powered fountain I bought online that my husband laughed at when I was testing it inside back in February. I always wanted one, but he said it was kind of wimpy and likened it to someone in need of medication. Once the intensity of the sun improved its performance, it has become a veritable fountain of youth…so much so, that I’ve had to artificially limit the sun to keep it from draining the bird bath as the wind carries the spray drift. The robins love it. The other birds are kind of scared of it. It was an inexpensive novelty (and birthday gift) that I’m enjoying just because I can.
  3. Fall Blues. monkshoodserviceberry
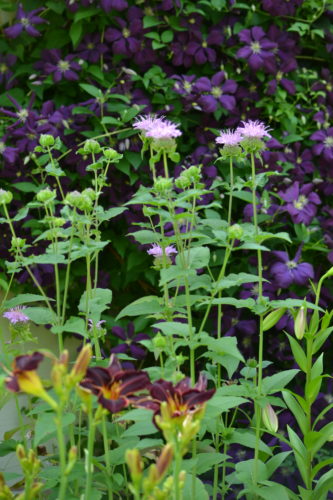
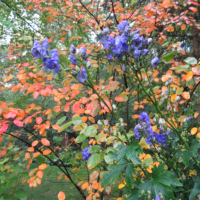
In the back corner of the The Perennial Border is a little tribute to fall. The blue leafed Hostas with lavender flowers, the purple turtlehead, and the towering cobalt blue monkshood all survive shade and the inevitable moisture in the back corner. Together, they make for a long lasting fall display of blues and purples with real pop, contrasted against the scarlet-orange foliage of the serviceberry.
  4. South Side. The RRAW winner of the South Side is the redbud tree. The ice storm managed to snap off its leader and required the tree to receive emergency spring pruning. The wrong time of year for such a thing on spring bloomers, but It’s Always Somethin’. You’ll notice that I have some items on the South Side (as well as elsewhere in my garden) that are considered either by ordinance or by experience, invasive plants. Gooseneck loosestrife, wood violets, ostrich fern, Lythrum, and archangel are among those making the invasive list. I would like to make a case for naturally existing invasive plants. They are only as invasive as we allow them to be. I remove the seed heads of the Lythrum so they do not spread, but I can enjoy the flowers while they last and the honey bees love it. If I lived along the lake or closer to the Des Plaines where it would pose a threat, I would feel differently and kill it, but this is a case of something which does no harm in my garden when carefully monitored. Likewise the other invasive plants can spread into the woods where nothing else will grow underneath the trees. It proves that a weed is only a plant growing where you don’t want it to grow.
  5. The Arbor goes nowhere except to the compost pile and where deer may leave ticks behind in the woods. So, don’t risk that. Instead take a glance at the far-from-my roses Japanese beetle pheromone trap which will be luring the adult beetles (which are sure to emerge shortly) and give them a party of their lifetime in the trap with all the other mating age promiscuous beetles with loose morals. Then they die in the trap far from my ornamentals without my needing chemicals or risking their widespread destruction of my garden. After the distant view, you can turn around since the arbor exists mainly to hide the utility boxes from view from the house and makes people think there’s something far more amazing back there than a compost heap and deer scat.
  6. Birds. And the places they live and eat. You’ll notice my feeders are an odd amalgam of contraptions to feed the birds which I do like without letting the food go to bully birds and squirrels. Genesis 3:1 “Now the squirrel was more crafty than any beast of the field which the LORD God had made. And he said to the woman, “Indeed, has God said, ‘You shall not eat from any tree of the garden ‘?” OK. It is supposed to say serpent, but I think the squirrel must be a close second in the craftiness category. They are always in search of forbidden food and to usurp man’s place at the top of the food chain. bullybirds like and dont like
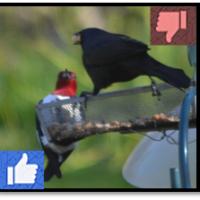
Same thing with bully birds like grackles, starlings, and sad to say, redwing blackbirds that I had always partial to because Morning has broken, like the first morning, Blackbird has spoken, like the first bird, Praise for the singing, praise for the morning, Praise for the springing fresh from the world. But then they were eating everything in sight and the bullies were taking over the yard, chasing off the birds I actually wanted to feed. Now, I know all birds and squirrels need to eat, but we will all get along if they know their place. So, a few baffles, cups, sticks, bottles, mirrors, bling, tape, and careful food choices later, I have limited their ability to chow and hog. They can eat in reasonable amounts and leave some for the others. Basically teaching birds and squirrels to play well in groups.
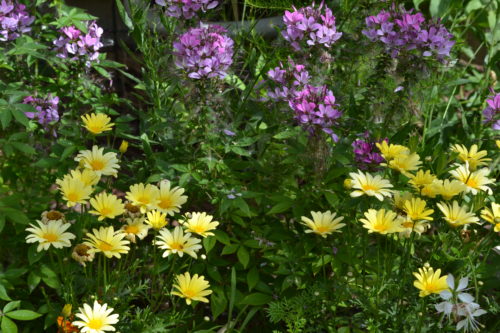
  7. Here today. Gone tomorrow. Mockorange is the shrub with the marvelous flower you may still detect as you head back up towards the deck. The yard came with singles and doubles. Only the doubles seemed to bloom this year. They were previously eclipsed in beauty by the ephemeral patch of bluebells which die down and leave bare spots to be filled in with annuals, or on a non-garden-walk year…nothing.
  8. All Hands on Deck. It is one of the sunniest spots in the yard so that’s where the vegetable garden is. I grow veggies in Earth boxes which are fitted with zip-tied trellises to support the tomatoes as they grow and trolleys to let them follow the sun. The trolleys are one hack I’ve done to provide sturdier support and they roll better compared to any little plastic wheels. Another hack is the “peg leg” wooden push pins on the bottom of the herb pots to give them a minimal footprint since otherwise the pots leave spots on the wood and the bungee cord belts make sure they don’t fall off the railing. The other pots (tomatoes and the peas/peppers/cucumbers) need additional water too, so I have retrofitted a wine bottle with a clay pot as a self-watering system. I have a tutorial for that online as well. Take a sticker for the self-watering planter and view it online. Because we are gluttons for punishment and want to test our status as top of the food chain, we are also growing ‘On Deck’ hybrid corn this year. I’m preparing to fence it off to keep the mice, flying squirrels, chipmunks, regular squirrels, and yes, blackbirds from devouring it so we can have an ear of fresh corn apiece as a reward for all the effort of growing corn in a pot.
  1. DSC_0601All Around.
    1. A little cutting garden in a raised bed. Why? Because cable TV and phone lines run underneath too close to the surface for actual planting.
    2. The wall supports for vines aren’t an indication of wishful thinking. Last year, the morning glories and sweet autumn clematis climbed all the way up and around the corner. Last winter the clematis died so I will buy another one in the fall when the stores carry them.
    3. The first year for a rose garden lantana treethat used to be on the west side of the garage before the shade did it in and forced its relocation. This year, the bunnies are hungry. Ah, It’s Always Something.
    4. The Burgundy Cotton crepe myrtle I brought back on the plane from Texas a decade ago and carefully overwinter each year in the garage. It’s beautiful during all three growing seasons so it’s well worth the effort.
    5. Houseplants love being outside in the summer…especially since we had new energy efficient (read as any plant’s worst nightmare) windows installed. Great on the energy bills. Terrible for maintaining houseplants indoors. Especially tough for the winter sun lovers like bougainvillea, gardenia, stephanotis, cymbidium orchids, and the hummingbird favorite, a lovely lantana tree that was a hanging basket a few short years ago.
  2. Woodland Path. Meant mainly as a cut-through for taking items from the back to the front yard without trampling our neighbor’s yard, the flagstone and plants like ostrich fern, Solomon seal, Trillium, lily-of-the-valley, sweet woodruff, spring bulbs like snowdrops, Chinodoxa, and wood violets all add to a woodland appeal. I used to have a ton of pink columbine here too, but they’ve migrated to the north side of the house wanting to escape the natural and invade the cultivated. Yup, it’s always something. There are a few hydrangeas that I had in pots outside of church one year that I brought home when I switched them out for a summer planting. (I hate throwing anything away.) They are marginally hardy and in this little microclimate, my hope is they’ll bloom this year. Like the Nikko Blue I have on the east side, they bloom on old wood and if they die down to the ground, they’ll just be leafy shrubs.
  3. West Side Story. Fierce rivals—the Suns and the Shades-have been fighting it out for years. I think the Shades are winning. It used to be hotter-n-blazes over here and the fight was intense just to stay alive. DSC_0622The hybrid tea roses and bee balm were rumbling with the orange daylilies. These days, it’s hard for the Suns to stay alive. The hybrid tea roses moved out to the back and the bee balm and peonies got shifted north as the shade continues to become more pronounced. The bleeding heart obviously love it. The clematis less so. I built these trellises myself and yes, you can read how I did it by taking a sticker for Barbara’s Big Trellis Adventure from the sticker page. There used to be 3 matching clematis and in a normal year, they cover the entire side of the house. Odd thing happened this year, though. They began to bud in the warmth of the sun on the siding before the linden leafed out, but then the cold snap came and frosted them back. Then the linden leafed and the Shades began to fight with the Suns. The clematis which gets the most sun has recovered more quickly and it would say I Feel Pretty. The others, well, Something’s Coming. Eventually, but probably not Tonight or in time for your garden tour. That would be the West Side’s RRAW deal. There are a few other daylily varieties here along with some Asiatic lilies for summer interest. And for year round interest, the paperbark maple has stunning fall color and really interesting peeling bark that is beautiful in its own way. It sure beats the messy crabapple that used to be on this corner, looking good only in the spring of life.
  4. Green Green Grass. Normally, we’d let the lawn go dormant in the summer but we decided you’d prefer to see it looking lush and carpet-like. It’s a favorite of dogs too, so we are in a constant state of repairing spots. Oh well. It’s Always Somethin’ outside of Eden.

That concludes the self-guided garden tour.

Please take stickers from the sticker page for any tutorials.

And kindly return the booklet to the greeters so others can enjoy a self-guided garden tour too.

Thank you!

* * *

(Note post-walk:  the stickers are now links within the text so you can read the tutorials)

Continue Reading

DIY Self-Watering Planters Tutorial

self-watering planters
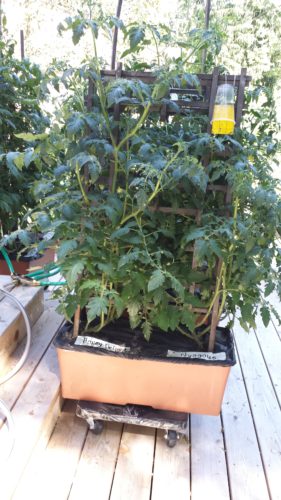
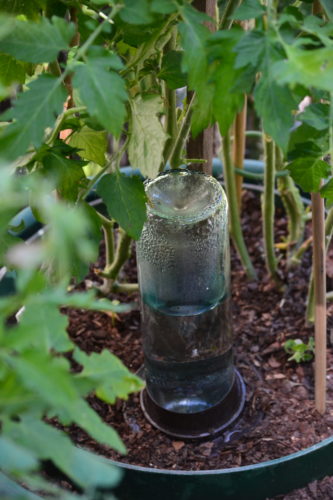
One of the blessings of a lifetime of gardening–even before I was Seminary Gal–has been developing little tricks for keeping my garden looking nice.  Enjoy these hacks for a million dollar garden at a budget price.  How many of us want self-watering planters, but don’t want the wallet-draining prices that come with them?  Today, you can learn to make your own self-watering planters, followed by 4 other quick hacks.

supplies for self-watering planterFor the self-watering planters, first you’ll need to throw a party and serve wine.

You’ll need empty wine bottles and drinking alone is never a good idea.

* * *

Besides, any craft that starts with “throw a party and serve wine” must be good, right?

* * *

Supplies needed:

  • empty wine bottle, no cork needed
  • unglazed clay pot with or without a hole.
  • a plastic lid that fits the pot
  • a empty yogurt cup
  • a hot glue gun or outdoor adhesive
  • a permanent marker
  • scissors or a craft knife
  • spray paint
  1. Make sure you’re sober before using the hot glue gun, permanent marker, or the knife.  If you didn’t throw a party and skipped that step, deciding to drink alone against the advice of Seminary Gal, just making sure you’re ok to proceed.  Don’t make me say “I told you so!”
  2. Using the permanent marker, mark pie shaped pieces as an asterisk formation on the reverse side of the plastic lid to make cutting lines (visible in photo above).
  3. pot and ring
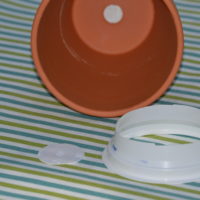
Cut the lid on the asterisk lines and also cut the bottom off the yogurt cup to give it a 1 inch height.  It should look like a ring.
  4. Save the bottom part removed for the next step.
  5. Take the clay pot and if it has a hole you will need to cover it with a disc of plastic.  Hey, you have the bottom of the yogurt cup and if you’re following directions, you’ll still have it!
  6. cover the hole
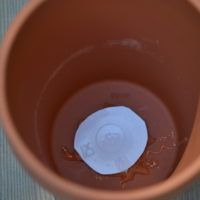
Using the hot glue gun VERY HOT, squirt some glue around the opening of the hole.  Gently and carefully press the disk down with the permanent marker so you don’t burn your fingers.  Are you paying attention here?   Friends don’t let friends get burned.  It’s why I’m not just a gardener but an evangelist.  I can tell you more if you want…
  7. Put the pot aside and squirt a ring of hot glue (VERY HOT STILL) around the plastic lid where the inverted cup will rest.  Don’t touch the glue.  Of course, if you’re using an outdoor adhesive, follow those label directions to do both steps 6 and 7 and then rejoin me after the glue has cured.  Hot glue and duct tape are amazing–they can solve the world’s problems.  Well, all but one and that’s why I am also an evangelist, but I already said that, didn’t I?
  8. pot and lid
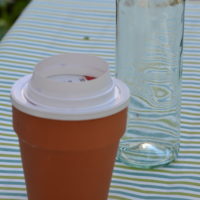
So now you have the two pieces which will fit together.  It’s like Garanimals or that card game you played when you were a kid.  Match them up by putting the ring lid on the closed hole pot.
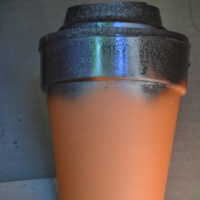
  9. You could theoretically put it in the planter just like this, but I prefer to paint mine for three reasons.  First, it’s much more attractive, (2) it blends in a little better, and (3) it actually seals the top of the clay pot to keep it from wicking moisture to the air.  And we’re not looking to increase the humidity (particularly in an Illinois summer) we’re looking to water plants.  Therefore, spray paint only the part that will be DSC_0586above the soil line in the planter.  The lower part of the pot must remain clay (which is porous) so the water will flow slowly into the soil.
  10. You’re at the last step, bury it to the lid level, fill the pot with water, fill the wine bottle with water, and invert the wine bottle into the asterisk ring stand.  Depending on how big the planter is and much your plant uses, you may need to fill every couple of days.  Keeping tomatoes in pots requires even moisture to avoid the fruit condition called blossom end rot, so I make sure my bottle is always filled.

See?  Self-watering planters in 10 easy steps.

trolleyThe other hacks are even easier.

Rolling Planters:  Why pay an arm and a leg for wheels for Earth boxes and deck planters or the equal sin of having the planters ruin your deck with constant moisture and the inevitable rings from contact?  I’m using furniture trolleys from my local hardware store and covered them with black plastic and duct tape.  They’re much more durable than the little plastic wheels that come with these planters, they roll better, and to top that off you can roll them to follow the sun.  God made you stewards of the earth and you can take authority over your deck!

diy pot feetPlanter Feet:  It doesn’t get much easier than this one.  Wooden push pins poked into the corners on the bottom of these square planters make great pot feet and keep them from staining the deck.  Yes, you can use your imagination, do round containers and provided you’re older than kindergarten you know that circles don’t have corners.  You can just space them around the round base of the container.  Easy peasy!

Bungee Belts: I hate it when the squirrels knock my planters off the hand railing.  Or a stiff breeze!  Aaaargh!  No more now that I have bungee belts for my herbs.  Pass the bungee cord under the railing and hook one side on the back of the planter and the other on the front.  You may be thinking, “It’s so easy!  Why didn’t I think of it?”  I can’t answer that, and maybe you did, but I put it in a post so we can both buy stock in bungee cords.

whitefly sticky trap bellsSticky Bells:  Are not the same as sticky buns which sound really good right now.  Sticky bells use a coat hanger hook, a plastic cup as an umbrella, and a whitefly sticky trap to keep those pesky white flies off my tomatoes.  No chemicals and my tomatoes are healthy, healthy, healthy!

Take stewardship over your garden!  It’s God’s gift to you as the top of the food chain!

Hope you enjoyed my DIY ideas for gardening.  Have a party and celebrate!  You’ll have saved yourself a lot of money and frustration with these self-watering planters and other nifty hacks.


Continue Reading

Beautiful Hanging Baskets Tutorial

beautiful hanging baskets June 2016I often get compliments on the beautiful hanging baskets on my front porch.  They are large but proportional to the elliptical archway under which they hang.  They are not round, but squarish, important so the pair doesn’t look like eyes staring at you.  Every year, I do something slightly different, but the result is always spectacular if I may quote friends and neighbors and not sound like I’m boasting.

Today, I’ll share with you how it’s done.
How to make beautiful hanging baskets:

window box1
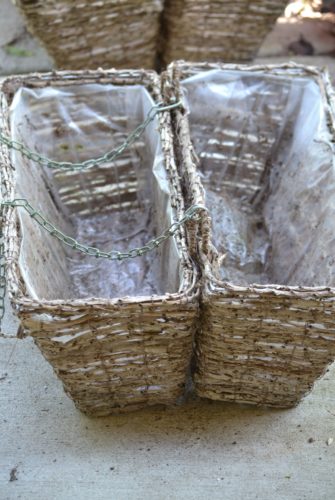
First, they are not hanging baskets at all.  They are pairs of window boxes with loops which have been placed back-to-back so they will hang evenly.

They are secured together with a chain link quick connector that you can buy at any home improvement store.  I use them so I can attach both baskets together along with a strand of chain link to hang the beautiful window box 2
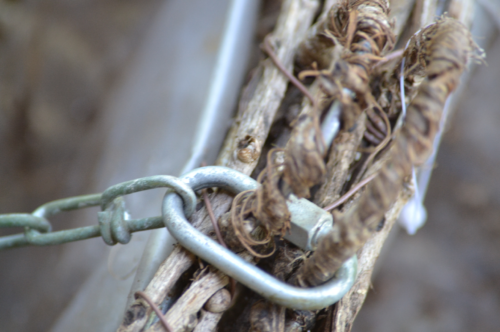
hanging baskets at their proper height.  When hanging, the quick link cinches the two baskets tightly to one another and leaves space for the strand to move freely so it doesn’t become uneven.  (Here’s a close-up of the link attachment.)

window box 3
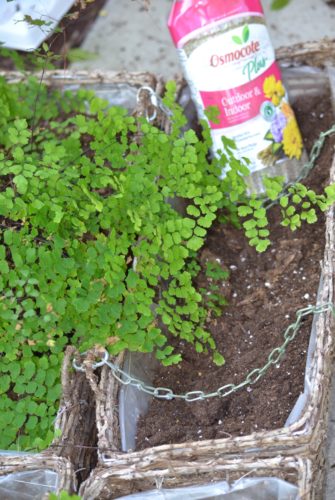
I fill them with potting mix which has been amended with a few water absorbing crystals and slow release fertilizer.  I use the water absorbing crystals because the window boxes are shallow, the plants will be numerous (in some cases moisture sensitive), and the location is under the eaves which will limit their receiving natural rainfall.  The gel, used in cosmetics, water treatment facilities, and disposable diapers, breaks down along plant roots and underground stems and by the end of the season, it will be decomposed having served its purpose.

Plant selection is important.  The ones in the backward facing window box will receive very little natural light unless they grow tall enough above the front plants.  Therefore, I summer some houseplants (maidenhair fern, Nephthytis, Pothos, and angel wing begonias) in the rear planting area.  I reserve the front planter for beauty and cascade.

Every year I do something slightly different.  This year I have the upright Fuschia ‘Gartenmeister’ with red tubular flowers and dark foliage, light pink angel wing and fibrous rooted begonias, Begonia ‘Solenia Dark Pink’, and a pop of the lime green creeping jenny.

The only thing left to do is to keep it watered and let yourself enjoy these beautiful hanging baskets for the rest of the season.  Watch and admire the butterflies and hummingbirds.  And watch out for any robins or house finches that might want to nest there since they have 2 broods each year.  And now you know my secret for having beautiful hanging baskets.  Enjoy!


Continue Reading

The March to November Garden

Today, I’d like to begin unveiling what I’ve been working so hard on during the past few months, a charity garden walk: The March to November Garden.  That’s how I’ve billed mine.  It might not sound impressive to those of you who live in areas of the United States or the world where growing seasons are always happening.  But for those of us in Chicagoland, a March to November Garden is what keeps us hopeful as we endure winters that seem to last 7 months of the year with a few weeks of spring or fall and then what feels like a humid furnace the rest of the year.

Many people who sign up for garden walks simply throw in the old gardening gloves and hire landscaping crews to make their yards beautiful.  But I have been doing it all myself.  My March to November Garden has been thoroughly Seminary Gal from design and planting to everything.  Yes, including weeding.

After all, my garden is outside of Eden where weeds grow more easily than flowers.  The weather never cooperates, freezing some, burning others, and those that survive the temperature extremes get water tortured which is always too much for most plants to endure.  Too little water can be resolved with a hose and plants often revive, but too much is simply too much.  They give up the ghost instead of revealing nature’s top secrets.

So here is a sampling of my list of perennials (Annuals–letter A– lasting A year and Perennials beginning with P which stands for Persisting in Perpetuity).  And yes, trees and shrubs live as perennials even though they’re considered woody rather than herbaceous.  This list also provides a clue as to what my March to November Garden looks like…or should like… if the bunnies and deer and rain-inducing fungus and bacterial stuff don’t get the better of me.  But outside of Eden, every year it’s something.

I’m starting my list with February because some years, we are overachievers.  But I didn’t want to brag and lose any credibility as Seminary Gal.

march to november garden
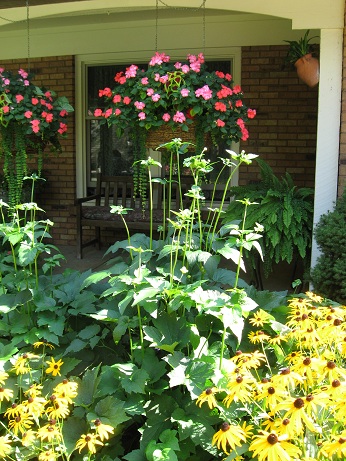
February/March: snow drops, winter aconite, Lenten rose, snow crocus

March/April: redbud, serviceberry, daffodils, early tulips, hyacinths, primroses, trillium, Scilla, bleeding heart

April/May: Spiraea, columbine, shooting star, trillium, Solomon seal, Geum, Ajuga, grape hyacinth, Viburnum, lilac, iris, Baptisia, Allium, midseason-late tulips, tree peony, sweet woodruff, wood violets, bluebells

May/June: mockorange, knockout roses, peony, Allium, Clematis, lily of the valley, wild geranium, Lamium, cranesbill geranium, forget-me-not, catmint

June/July: roses, hydrangeas, daylilies, coneflower, black-eyed Susan, cardinal flower, Sedum, lamb’s ear, lilies, bee balm, Penstemon

July/August: roses, hydrangeas, daylilies, coneflower, black-eyed Susan, cardinal flower, butterfly weed, Sedum

August/September: gooseneck loosestrife, Clematis, turtlehead, Joe Pye weed, roses, hydrangeas, daylilies, coneflower, black-eyed Susan, Sedum

September/October: Japanese Anemone, Sedum, turtlehead, monkshood, fountain grass, phlox, Chrysanthemum

October/November: Japanese Anemone, Sedum, fountain grass, Chrysanthemum 

Into winter, I have things that are beautiful to behold…the lovely Royal Frost Birch, the red and yellow twig dogwood, and the pretty cinnamon colored peeling bark of Acer griseum (paperbark maple).  But by the time November rolls around and beckons winter to blanket my yard with snow and ice, I’m pressing my nose against the cold glass windows, looking out over snow and deer tracks, and wondering how long until spring?  It’s more than March to November in actuality.  It’s a year-round garden outside even if my main physical gardening activity comes indoors to make the long winters a little more bearable.

Perennials are like a fireworks display–each flower displays its glory in its season, but then fades as its time in the spotlight ends.  Because of gaps in that display, I also have annuals in my garden, but that’s for another post.

Ecclesiastes 3:1 There is a time for everything, and a season for every activity under heaven

Continue Reading

A Walk in the Garden

While I’ve been absent from writing posts, there is something else I’ve been doing in this season of service.  Thankfully, my life hasn’t been concerned only with sewer systems and advocacy for my neighbors in my home town.  I’ve also been carefully preparing for a walk in the garden (my garden, actually) fulfilling a commitment I made a year ago to open my yard for a garden walk for charity.

As many of you know, I have a special connection to gardening. 

A walk in the garden was something God did back in Genesis.  He created Eden as a place for Himself to exult in His joy of creation and to surround Himself with beauty that began in His mind.  I enjoy all of God’s creative beauty and marvel–in artistic wonder–at the diversity He created.

Eden also became a place for man

(mankind being part of God’s creation in which God takes great pleasure)

It was a place for man to walk with his God.  A place of communing and worship.

But the garden was also a place for vocation.  Tending the garden is the world’s oldest occupation.  There’s something kind of joyful about God giving me activities to bless my days through gardening.  And while it is harder work since Adam and Eve disobeyed God, it is work that I also enjoy doing.

My garden is a place where I do what I was created to do: worship God and serve Him.

walk in the garden


Continue Reading
1 2 3 5