Fall Gardening Checklist—Taking Cuttings

Genesis 1:12 The land produced vegetation: plants bearing seed according to their kinds and trees bearing fruit with seed in it according to their kinds. And God saw that it was good.
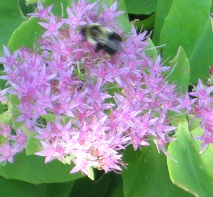
One of the miracles of plants is their ability to reproduce by means other than simply seed (which is miraculous in and of itself).  While seeds form as a result of pollination of flowers (the plant’s natural sexual reproduction function—the birds and bees for the plant world), many of these same plants can also be grown from cuttings or divisions.

Moreover, some plants can only be obtained through asexual reproduction (by cuttings or divisions) because the seeds will produce flowers that are not true to their parentage.  This happens because of genetic variability within a plant and the careful hybridization that was used in forming the original hybrid.  Asexual reproduction is basically cloning because the resulting plant has the same genetic makeup as the parent.

Given the hard work involved in carefully breeding for special characteristics, many hybrids are patented which means that asexual reproduction cannot be used to make plants for sale without prior permission from the patent owner.  My interest in propagating with cuttings or divisions is to increase my personal collection of certain plants or to make the overwintering of them easier indoors.   You know how it is—so many plants, so few windows.  Alas, I wish I had a greenhouse.  There, I said it!  A greenhouse would provide hours of entertainment and give me more space to fill with the plants I love.  And I love lots of plants—which you can interpret either way and it’s a true statement.

Cuttings do not take up nearly the space of a whole end-of-the-season-plant and can be grown in a window with supplemental lighting to help them make it through the winter.  I probably do this less because I want to multiply anything for my own garden and more because I like certain varieties and want to hold them over.    My huge mother plant of Martha Washington geranium went out to the curb with a FREE sign on it because I have two baby plants in its place.  I gave away one of my gigantic strawberry pots and will divide and repot my remaining strawberries next spring.  I’m thinking of investigating one of the faddish “upside down planters” to see if they actually work.  My hope is that it will work better than a strawberry tower at keeping birds and slugs from nibbling.
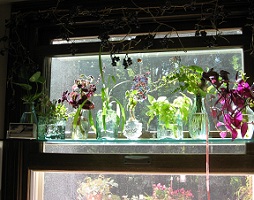
I have a couple of geranium varieties that will come indoors as well as some impatiens and coleus.  Many cuttings will be started in vermiculite (as my post March into Spring  illlustrated), but others will look simply lovely in little glass vases above my kitchen sink.  They help to cheer a long winter during which I will look out my window and see day after day of snow and cold.  But to see it, I’ll have to look beyond my indoor reminder of perpetual spring on my windowsill.

I have also separated and repotted my amaryllis bulbs for winter bloom.  Some varieties of my amaryllis are oddballs and don’t leaf and flower when I expect them to.  Others are as predictable as can be.  I try to let the foliage die back at the end of summer by drying them out and then remove the spent foliage and let it rest in the dark.  Then I repot them for this year’s flowering.  It takes somewhere between 7-12 weeks after a rest for many amaryllis to bloom again.

As some of my cuttings take root and grow to sizeable plants themselves, they’ll become stock plants for next year’s garden and I will take cuttings all winter to have enough for planting in the spring.  It’s part of how I can stay encouraged during the winter that hope springs eternal.


Continue Reading

Fall Gardening Checklist–Bringing Plants Indoors

 Be glad, O people of Zion, rejoice in the LORD your God, for he has given you the autumn rains in righteousness.  (Joel 2:23)

With the equinox, fall is officially upon us.  But for people like me, fall has been ongoing for a while now: my calendar is a gardening one.  The rains are here and the air has a crispness telling the trees to display their colorful best as if it’s a designer’s runway show finale or an end of season spectacular.   There are four major gardening checklist items I’m considering at this time of the year:

  1. Bringing houseplants indoors
  2. Taking cuttings for growing under lights
  3. Preparing outdoor plants for winter
  4. Assessment and replanting

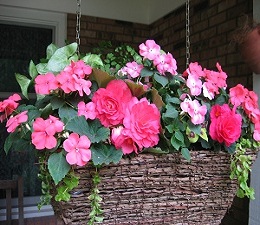
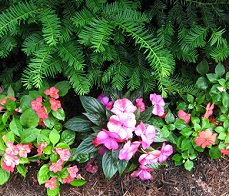
Let’s focus for now on the first two: bringing plants indoors as houseplants or cuttings.  The early onset of cool temperatures taught me that Fusion impatiens (pictured far left) won’t tolerate temperatures dropping below 40 the way that other impatiens do. They dropped almost all their leaves. Fortunately, I took cuttings before it got cold so I could grow them under lights inside.

Other extreme measures involved taking my huge hanging baskets down overnight and covering them with frost cloth since the air temperature gets cooler than the garden or ground temperature. The houseplants filling in the reverse side (e.g. beautiful maidenhair fern and Fittonia) might not have handled the cool as well as the ivy. The Nepthytis may be less sensitive than I thought since I noticed the Chicago Botanic Garden had them planted in their fall display beds in their bulb garden.  I loved how mine looked and didn’t want to take a chance that they’d be harmed by a night below 40, so I took them all out of the back of the doubled window boxes forming my hanging planters, potted them up and brought them inside.

My process for bringing houseplants indoors involved applying systemic insecticide to them while they were still outdoors. This process began 3 weeks ago knowing that our first frost date is typically around October 16th and houseplants generally need to come in when it’s in the 45 to 50 degree range. There are a few exceptions which I’ll mention in a moment.

I begin with a thorough washing of the leaves of the plants with a gentle spray from the garden hose.  That alone, however organic and nice, will not prevent insects from popping up indoors.  Systemic insecticides will protect my plants indoors once they’re inside for the winter. But my favorite Bayer product for houseplants (a pill form injected into the soil) doesn’t work immediately so it requires some planning. It also doesn’t work on spider mites which seem to pop up out of nowhere. So the miticide (which smells truly awful) gets applied only while the plants are still outside. I also spray my houseplants with a spray to kill any adults or eggs on the plants that might escape. Few things are worse than infested indoor plants.  I do not like to spray chemicals on my plants indoors because the spray droplets in the air can be lethal to both parakeets and fish and therefore, I take an integrated pest management approach outside before bringing things in…to prevent winter problems as best as possible.  My indoor controls have been restricted to a long shower in my bathtub, yellow sticky traps and perhaps insecticidal soap, so the Bayer product mentioned above is a welcome alternative.

When the cold temperatures came, my plants were ready to come inside. I usually plan on doing the indoor-outdoor hokey-pokey dance for a week to ten days with my plants so that they can become acclimated to lower light conditions indoors.  The plants come in.  The plants go out.  The plants come in and turn all about…
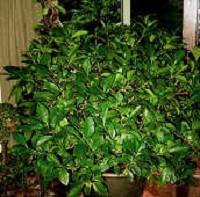
Some plants get a drastic haircut because they won’t fit in my house and let me live there too. My gardenia (pictured post-haircut with cuttings used for a new plant) and the “nasty-wasty-30-year-old-sour-orange-tree” which I will feature in an article someday are both simply too big and get cut back since south windows in my home are at a premium.  The sour orange stays out until absolutely necessary since it’s my husband’s sentimental plant even though it grows huge thorns and has no redeeming value.  One would hope it might flower some day, but at the age of 30 it’s had years of opportunity and all kinds of therapy.  We don’t hope for too much from it.

Among the other plants I leave out until it is very cold (but not freezing) are my cymbidium orchids.  They need cold temperatures to set their flower buds.  The reward is well worth careful attention to it!  Many varieties of ivy can handle cold temperatures, some even below freezing so I have been known to use them in fall planters until even the mums give up the ghost.  Finally, there are my Boston ferns.  The cooler temperatures and reduced natural light intensity help to prepare them for bringing back indoors.  It also gives me plenty of opportunity to let them shed dead leaflets (called pinnae) outside so that I will not spend as much time sweeping them up inside.

With smart, tender loving care, houseplants will help to brighten the long winter days.  They add a living touch to every room and careful planning to insect prevention and acclimation to lower indoor light levels will mean that they’ll be a joy and not a burden.

Continue Reading

Caring for Daylilies

How do I care for my daylilies? 

It’s a common question and sometimes daylilies can seem confusing with respect to their maintenance.   Hemerocallis, the daylily, is not a true lily and that fact is itself a source of confusion.  To compound matters, the variability within the genus Hemerocallis is quite remarkable.  Daylilies grow from fibrous root systems and will send new growth from the expanding crown as well as from the spindle-like tuberous roots.  These swollen roots are storage features that enlarge to hold a reserve of food, helping the daylily to grow and spread.

Even though each flower lasts only a day, the flowers themselves come in a variety of colors and shapes.  A great resource regarding daylilies is the American Hemerocallis Society and the organization has a great page of frequently asked questions about caring for daylilies.

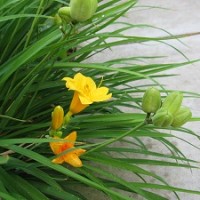
Caring for DayliliesOf the frequently asked questions I received on the sales floor, people asked how to care for their daylilies.  They’d bubble with excitement at seeing a big daylily that looked like this (right). 
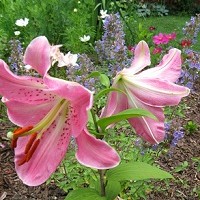
Don’t be deceived, I’d warn them, this is almost finished with its bloom. 

It was a teachable moment as I described how to remove the seed pods to extend the season of bloom to its fullest extent.  If it looks like a walnut, pick it off.  If it looks like a torpedo, leave it alone–it’s a flower bud.  It’s a pretty memorable rule of thumb…or green thumb.

Removing seed heads, often called deadheading, is particularly important for extending the bloom season of daylilies like Stella d’Oro, Happy Returns, Just Plum Happy, etc.  Removing the walnut shaped seed pods, and indeed the entire stem/stalk/scape after all the blooms of the stalk have finished will ensure that your repeat bloomers will be more likely to give you their full season’s worth of beauty.  It also makes the plant more attractive than with a myriad of dead stalks waving in the breeze, proclaiming “Look at me!  I’m done blooming!”

As the first flush of bloom is winding down, I become intentional about making sure it has a well balanced fertilizer with added phosphorus (a blooming plant fertilizer with a higher second number such as a 15-30-15) so that it won’t really pause too much with the heat of summer.  I find my Stella d’Oro and Happy Returns want to go dormant during the hottest part of the summer, but fertilizer and plenty of moisture help to mitigate that tendency.

You can find helpful lists of extended season bloomersalthough many garden centers will carry the plants locally. 

At the end of the growing season, as the frost kills the foliage, I remove all the dead leaves so that only the crown remains for the winter.  Fall, before the frosts arrive, is a good time to divide and transplant daylilies although the early spring before they are fully leafed is fine as well.  Once the clump is formed and leafed out, division will delay—if not prohibit—bloom and will result in a misshapen clump instead of the neatly rounded clumps that form naturally.  Some daylilies, particularly the one growing wild in parts of the Midwestern United States, can be rather invasive so careful location and planning–while always wise–becomes imperative.

Daylilies are a remarkable group of plants and are easy to grow, faithful to bloom, and can tolerate a wide variety of conditions.  It’s why daylilies have been a staple of every flower garden I’ve ever had.

Continue Reading

What’s in a Name?

When I worked at Home Depot, there was always confusion when the Asiatic lilies went on sale.  People would arrive at the registers with all kinds of things—calla lilies, day lilies, peace lilies, even lily of the Nile.  What’s in a name?  Aren’t all these things lilies?

Every plant has a common name which serves kind of like a nickname.  But each plant also has a Latin name for classification purposes and this is what we rely upon most often to help us understand what plant we are discussing.  Just as many children can be nicknamed Princess or Sport, our legal, given name is much more specific.

Plants have a legal name, if you will, that consists of a genus (larger group) and species (subgroup).  Beyond that, certain cultivated varieties (cultivars for short) will have a name in quotes which makes it even more specific.  The Oriental lily  Lilium ‘Farolito’ shown here is a cultivar.  Lilium x ‘Kiss Me Kate’ would be a hybrid lily denoted by an ‘x’ to show that it is a cross between a longiflorum lily (like an Easter lily) and an Asiatic lily.
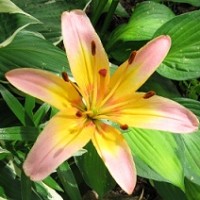
In the case of true lilies, there are types (Asiatic and Oriental, for example) both in the genus Lilium. Yet Asiatics will display similarities to each other because they are Asiatics.  Each species within Asiatics will have different characteristics—flower colors, markings, fragrance, height, etc.  Asiatic and Oriental lilies, being closely related (like siblings), have many features in common and can be hard to tell apart.  There are a few web sites discussing the differences, often times that Asiatic lilies open upward and Oriental lilies open outward and are more highly fragrant.  Beyond that, if I desire specifics, I look them up on the grower’s listing since it simplifies matters greatly.

Other plants we commonly call lilies are actually in different genus altogether.  Calla lilies are in the genus Zantedeschia; Daylilies are Hemerocallis, Peace lilies are houseplants in the genus Spathiphyllum, Lily of the Nile is an Agapanthus.  All are wonderful plants, but none of them are technically lilies.

And why do you worry about clothes? See how the lilies of the field grow. They do not labor or spin.  Yet I tell you that not even Solomon in all his splendor was dressed like one of these.  If that is how God clothes the grass of the field, which is here today and tomorrow is thrown into the fire, will he not much more clothe you, O you of little faith?” Matthew 6:28-30

What’s in a name?  Quite a bit actually. 

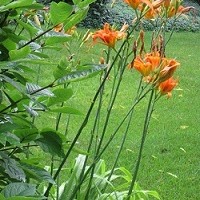
They grow differently in form—lilies (pictured on the left)  are flowers emerging atop leafy stalks, daylilies (right) form clumps.  They originate from different structures—lilies arise from bulbs, daylilies grow from fibrous root systems that will enlarge into spindle-like roots resembling tubers.  Lily flowers are long lasting and open from the lower buds to the upper buds.  When the buds have all opened, the flowering is completed for the year.  Daylilies, on the other hand, have a short bloom—each lasting only a day, hence daylily, however the season of bloom may be quite extensive.  Lily bulbs must be planted at a sufficient depth to protect them from the harsh winters, but not so deep that the plant must struggle through an endless stretch to reach the soil surface.  Daylilies are planted so the crown is at the soil level with the fibrous roots and tuberous spindles are stretched out just below the soil surface.  Lilies will grow larger clumps by growing increasing bulb sizes as well as by dropping bulbils (present after bloom in the leaf axils) off the stem onto the ground.  Daylilies, depending on variety, can be downright invasive…emerging anywhere there’s an opportunity within the range of the mother plant.
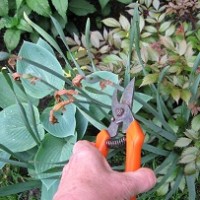
Before you buy any old lily for your garden, it always helps to consider:
What’s in a name?
Continue Reading

Goodbye Spring–Hello Summer

Today is Memorial Day and a day for remembrance of America’s fallen patriots who have ensured ongoing liberty.   For many gardeners, though, it has also become a border crossing saying “Goodbye Spring” and “Hello Summer!”

Among the Spring Goodbyes are a farewell to tulips and daffodils.  The blossoms of many of these—except the latest season tulips—have faded and the inevitable question arises of how to deal with the dying foliage.  Let’s face it: dying foliage looks unsightly whether it’s cool spring beauties dying with the heat of summer or summer splendor dying as the frosts of fall bring the growing season to a close.

How do you deal with dying daffodil leaves?  People have often suggested that they tie daffodil foliage in bundles or braid it; some cut it off completely; some leave it to die; and others ask about the best way of dealing with dying foliage of daffodils and tulips.

I normally do two things:  First, I cut off the blossom end with pruning shears or scissors.  The purpose of this is to prevent the bulb from going to seed and depriving next year’s bulb of valuable food.  Second, to ensure that the foliage can make food and die in its season—yet not be an eyesore—I interplant daffodils and tulips among other plants so the dying foliage will be hidden among the new growth.  Braiding, bunching, and removing the foliage prevents the leaves from making necessary food.

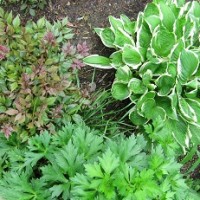
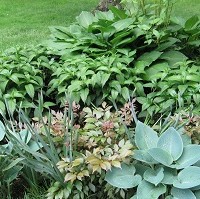
Pictured here are two instances of daffodil inter-planting.  In the wet area of my yard, the hostas, astilbe, turtlehead have emerged and I can tuck the foliage behind these companion plants until it has completely died back.  The foliage will continue to make food with plenty of sunlight and grow the bulk of the bulbs, then the summer perennials will fill the space left behind as the daffodils recede.
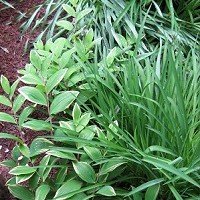
Daffodils interplant beautifully with daylilies and variegated Solomon Seal.  Tulips and hostas are also a natural companion planting for part sun areas. 

Again, careful plant selection is helpful. 

If your tulips are in full sun, then consider daylilies, coneflowers, or Rudbeckia.  If they are in part sun, hostas, astilbe, cranesbill geranium would be good companion plant choices.  Some of the earliest season tulips finish their blooming/receding cycle before the trees experience bud break, so these Greigii, Kaufmann, and other early tulips can be planted in areas along with small scale hostas that will be shaded later in the summer.

Plant selection is important for the garden but even more important for container gardens. 

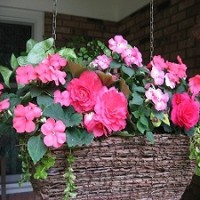
Since a container garden must share the same watering requirement and light level, taking care to select compatible companions is helpful.  Consider these hanging baskets I made from two window boxes back to back.  They are hung from their back loops by using chain link (painted with craft paint to reduce its sheen).  The back window box has maidenhair fern, ivy, fittonia, and nepthytis and the front window box has creeping jenny/moneywort, coleus, tuberous begonia, and impatiens.  Since I will never rotate these, the front box will get brighter light and the back box will be even more shaded and moist.  I like the stewardship present as well since the maidenhair fern, ivy, fittonia and nepthytis are all houseplants that I’m summering outdoors and the creeping jenny was recycled from early spring pots.  I enjoy creating beautiful things primarily from what I already have on hand, plus an added item or two.  Beauty from season to season!
Goodbye Spring.  Hello Summer.
Continue Reading

Peonies–Masterpieces of May

There are ants on my peonies,” she said to me.  “I’ve heard that peonies need ants for the buds to open.  Is that true?” 

When I worked at Home Depot, I could guarantee this query at least a dozen times each weekend that the peonies were in bloom.  Gardening has its share of pieces of Folk Wisdom and this isn’t one of them.   
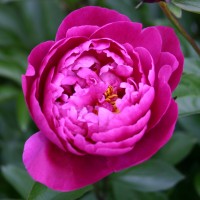
Peonies can open perfectly well without ants. 

The ants are there to take advantage of a reliable dinner.  As peonies open, they secrete a sweet sap along the edges of the petals through specialized cells called nectaries.  Many flowers have nectaries within the flower to encourage pollination.  Some plants like Trumpet Creeper, Hibiscus, Elderberry, and Willow have extrafloral nectaries.  Peonies have their extrafloral nectaries along the edges of the buds.  As these glands exude the sap, it’s the equivalent of the ice cream truck driving through the neighborhood.  Every ant and its uncle come scurrying for a sweet treat.

Should you get rid of the ants?  Many soft-hearted and environmentally conscious people say “No.”  The ants keep other insects or foraging animals from damaging the blossoms.  I am a bit more pragmatic.  If the peonies are close to the house, I think beyond peony season.  Frankly, I don’t want ants building expansive communities that will become a hungry mob of marauders turning to my kitchen with the inevitable rainfall that occurs when peonies are in full bloom.  I also don’t want to bring ants into the house with my cut flowers. 

As long as they stay away from my house, I say “Hope you enjoy your meal.”  The minute they head toward my home they’ll encounter a barrier treatment of insecticide that will kill them.  The peony will have served as kind of a last meal.  The smart ants will learn to stay outdoors and find all that nature can provide.  The insolent ants will meet their Maker.

To keep from spraying my peonies with insecticide, I submerge the newly opening cut blossoms in a tray of water until the ants float to the surface or I spray them with a gentle shower to wash the ants off with a hose before bringing the peonies inside.  A gentle upside-down shake removes excess water and I can enjoy my floral arrangement without inviting unwanted houseguests.

Peonies enjoy full to part sun, are heavy feeders, and come in singles and doubles as well a variety of colors.  They can endure in the same location for decades and reward you with their beauty in the spring and their durable shrub-like foliage until the fall.  They require some additional care with respect to planting depth and are best divided in the fall in order to bloom happily.  They are some of the oldest cultivated plants for good reason—they are truly among the masterpieces of May.
Continue Reading

Problem Gardens—Shade

Every house in which I’ve lived has had its garden problems:  too much shade, too much moisture, too much sun, too much heat.  The key to overcoming these garden problems is plant selection.

Just as every one of us has unique personal tastes, every plant has conditions that promote its best growth, conditions it will tolerate, and conditions where it will surely die.  Forcing a plant to live where it will surely die means the end result is disappointment.  Plant selection is important.

The best ways to select plants involve researching which plants perform in shade.  One of my favorite gardening web sites Dave’s Garden has the care and cultural requirements of many plants so you can see what will survive in your area (sun, shade, and hardiness zone).  These are submitted by gardeners just like us so we’re getting people’s personal experiences (positive, neutral, and negative) and advice on overcoming problems.

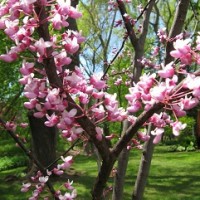
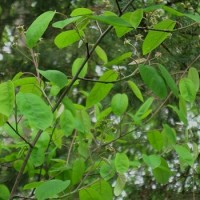
Here are photos of some of my favorite plants for part shade to full shade.  As they continue to grow and bloom, I will post more photos.  Redbud (Cercis canadensis, below left) and Serviceberry (Amelanchier canadensis, below right) are two “understory” trees which means that they can handle growing in the shade of taller canopy trees.  They generally stay shorter and they adapt well to part shade conditions.  Both flower in the springtime.  The Serviceberry blossoms have faded but it has begun to set fruit which will develop fall color in addition to the leaves which makes it multi-seasonal in its beauty.


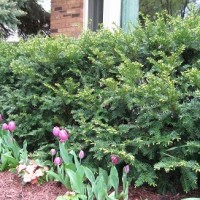
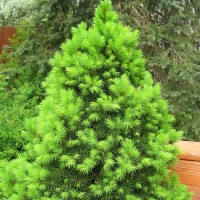
Among the evergreens that do well in shade, the Dwarf Alberta Spruce can handle significant shade, is slow growing, and is one of the few plants whose cold-hardy root systems can withstand being grown in a pot even through a Chicagoland winter.  This Dwarf Albert Spruce (Picea glauca, below left) has been growing in a pot for 5 years.  Their root systems are not large; their slow growth keeps them an ideal size for winter interest by the front door; and their new growth forms bright green “candles” that do not need trimming.  Yews (Taxus, below right) come in upright and spreading forms.  If you’re replacing some of these versatile foundation plantings, make sure of which type you have.  I keep mine  hand-trimmed to maintain a somewhat less formal look, but they respond well to mechanical trimmers.


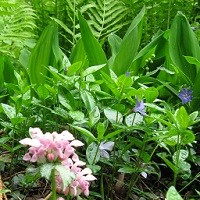
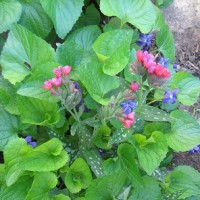
Here are some of my favorite flowers for shade.  Deadnettle (Lamium, sp) comes in a variety of leaf forms and flower colors.  This one (foreground below, left) is “Pink Pewter” and is followed by Vinca, Sweet Woodruff, Lily of the Valley and Ostrich fern.   I have some blue lungwort whose flowers resemble bluebells, but this variety “Raspberry Splash” (pictured below) provides a nice color contrast to wood violets and pink columbine.  Another fine feature is that deer don’t like any of these.


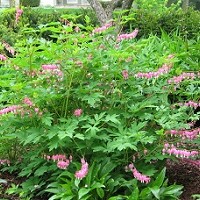
Likewise, bleedingheart (below, left) can handle shade and deer don’t like them.  Astilbe, Aconitum (below, right) will be later to bloom and I spray my hostas with TreeGuard to keep the deer from devouring them.


Why do some plants not tolerate shade? 

It has to do with several plant characteristics.  First, not all plants have the kind of capabilities in shady environments as shade-loving plants.  Plants adapted to shady environments will often have (1) thinner leaves, (2) larger leaves, (3) more chlorophyll–the green pigment in leaves that helps with photosynthesis, and (4) these plants are more concerned with light harvesting than building leaf bulk.  Sunny plants, on the other hand, build up protective mechanisms and structures within the leaves and will have a different ratio of pigments in order to protect themselves from the intensity of the sun.

Why is this important?  For two reasons:  (1) it means that some plants will never survive in sun or shade depending on its ability to adapt to the environment, and (2) it is important to allow seedlings grown indoors or plants grown in full sun to adapt—a process called acclimation or hardening-off (in the case of seedlings).

Have you ever taken tomato seedlings you’ve carefully pampered inside and brought them outdoors and they seemed to fry out in full sun?  Tomatoes are supposed to have full sun, right?  Yes.  But they need time to adjust to the increased light conditions outdoors.  So acclimating the seedlings gradually over a period of a week to 10 days will give them a chance to thicken their cuticles (waxy layer on leaves) and to structurally make changes to deal with wind, sun, rain, fluctuating temperatures, etc.

Of if you’ve ever bought a Ficus tree as a houseplant, brought it home, and it immediately dropped a lot of leaves, this is because it’s acclimating itself by putting off leaves that will be ineffective for your environment and putting on new leaves that will help the plant to survive in your home’s conditions.

Just as we were Created to BE Individuals, our understanding the individual characteristics of plants will help us to have a successful experience with garden and houseplants and demonstrate patience while our plants adjust to the changing seasons and their new environments.

Continue Reading

On Hummingbirds and Orioles

Part of the joy of gardening is the beauty of wildlife drawn to a well planned garden.  I love birds.  When I was a child, I kept a bird-watching journal and enjoyed identifying birds and their habitats.  A long time ago, I abandoned the written journal, but mentally, I have a record of birds in the yard and when their seasons are.
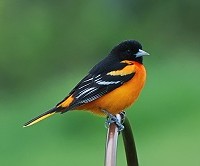
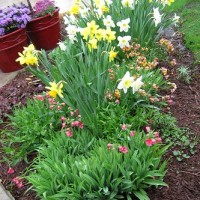
We’ve just begun the month of “Maybruary” as a friend put it.  It’s a very cold start to May.  Everything blooming is about two weeks behind a typical year.  For that reason, I ignore what the scenery looks like and pay close attention to the calendar and on April 20th, I put my feeders out for both hummingbirds and orioles.

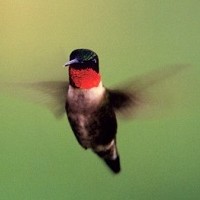
I’m glad I did since many of my flowers that hummingbirds rely upon are weeks behind schedule.  The ruby-throated hummingbirds arrived last week and found their feeder right away.

The orioles arrived yesterday with their brilliant orange and black markings!  I’m so excited at seeing these two beauties.

I’ve found three keys to keeping hummingbirds and orioles in my yard:


  1. Put the feeders out early before the birds arrive.  When hummingbirds and orioles find available food, they’ll make your yard their home for feeding and maybe breeding.
  2. Do not use soap of any kind to clean their feeders.  Bleach and water mixed will disinfect the feeder without leaving a soap taste that birds hate.  I always rinse it very well but am reassured by knowing that any bleach traces left behind are not harmful to birds because of the way bleach chemically disappears in the sugar solution.
  3. While commercial nectar solutions exist, I find that the color of the feeders catches the attention well enough that birds are happy with fresh “nectar” solution made with one part sugar to four parts boiling water.  I boil the water to make the sugar easier to dissolve.  Then I let it cool before putting it in the disinfected feeders.

While I’m sad that the juncos (snowbirds) have left for the season and the cedar waxwings have been passing through, I know that the arrival of the migratory indigo buntings, scarlet tanagers, and rose breasted grosbeaks will be shortly.  The calendar says Yes, even if it seems we’re in Maybruary.  So I have seed ready for the birds that are seed eaters.  And I trust God to provide insects for the insect eaters.  And guess what?  As I’m writing, the first rose breasted grosbeak of the season just arrived at my feeder.  How wonderful!   I am privileged to play a small part of God’s plan for feeding the birds.

Look at the birds of the air; they do not sow or reap or store away in barns, and yet your heavenly Father feeds them. Are you not much more valuable than they?  Matthew 6:26

Continue Reading

Real World Gardening–Out of Eden

I sometimes watch ads for products and services and I’m not sure whether to laugh myself silly or be appalled.  It’s going to take more than Miracle products to have a perfect garden like those made for TV.  It’ll take a real miracle: the Second Coming of Christ. 

Yes, more than advertized rescue inhalers will be needed to rescue African violets planted in an outdoor flower bed next to kalanchoes and cyclamen.  Even garden center ads show this very same thing.  Obviously none of these people garden in the real world where houseplants want to stay in the house instead of flaunting audacity; laughing in the face of destruction, and throwing down the gauntlet for a gang of aphids. 

Real world gardening involves everything being beautiful its time (Ecclesiastes 3:11). 

  • Things bloom.  Things seed. 
  • We sow.  We harvest. 
  • We plant good seed and get weeds.
  • Gardening has its seasonal ups and downs.
  • 

News flash:  my garden isn’t perfect.  I have real world gardening. 

Gardening in a world marred by sin means that we have had the cloudiest April on record but the upshot is renewed compassion for friends in Seattle with their rainy days.  In Chicagoland, rain and cool means we’ll have real world rot, a world of leaf diseases, and really happy slugs.

Despite the battles against the thorns and thistles outside of Eden (Gen 3:18), I rather like the challenges that each year brings.  It keeps life interesting and spurs me to creative problem-solving.  Every year, I try something different and even if I didn’t, the weather conditions rarely present themselves as ideal for the same things.  I go back to the drawing board anyway.

Even in the midst of dreary days, perennial features such as the cheerful yellow forsythia, “Cardinal” red-twig dogwood, and King Alfred daffodils lift one’s spirits.
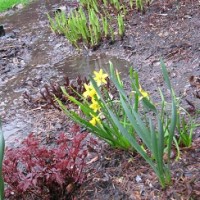
And look at the beautiful range of colors of emerging growth of turtlehead (Chelone obliqua), Astilbe ‘Fanal’, and hostas—all of which tolerate standing water for short periods.  Good thing, since in every real world garden a little rain must fall.  This particular garden is always among the last to be worked because it is a low spot in our yard.  I find that working our higher front yard to the lowest back is always helpful since that’s how things aren’t worked when it’s too wet.  Working the soil when it’s wet ruins the structure.  Mulching when it’s raining causes the ground to retain the soggy conditions longer.  It’s important with conditions like these to research carefully what plants will survive in such Out of Eden locations.
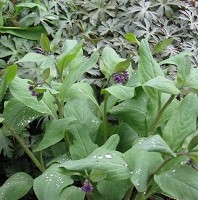
My bluebells (Mertensia virginica) are budding and my native cranesbill geranium (Geranium maculatum) won’t be outdone.  Also in my woodland garden are lily-of-the-valley (Convallaria majalis) and sweet woodruff (Galium odoratum) which are not native but escaped cultivation and are real showstoppers.  I like that phrase:  escaped cultivation.  Makes them seem like garden rebels…or too beautiful to be held captive.
Gardening in the real world: creative ups and downs.  Cultivation and escape.  Adversity and beauty.  It doesn’t get any better than this.  Until Jesus returns, that is.

Continue Reading

Barbara’s Big Trellis Adventure

Last year, my clematis that I bought grew so big that they topped the trellises I had on the side of my garage and cascaded back toward the ground.  This year, I’m giving them support worthy of their vigor and beauty.

Since it’s early spring, I know now is the perfect time to make the change and to provide new garden structures.  Originally, I bought some wrought iron wall art that I was going to hang on the wall and pull the clematis vines up to the ornamental plaques.  But then, I began to think about rust stains developing on my siding and decided to consult my neighborhood Home Depot for better options instead.
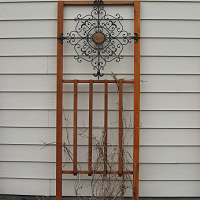
While I was there, an idea germinated—I’d build my own trellises and use the wall art as a decorative insert. With the help of my friends at the Vernon Hills Home Depot, I now have three “Dream Trellises” that I built myself.

Better yet, I didn’t have to cut a thing.

With 2-8 foot lengths of cedar, 3 2×2 cedar balusters and 4 angled cedar balusters for each trellis loaded in my car, I went home to begin construction.  I am known for my garden.  I am not known as a handy person so I became a neighborhood attraction.  Everyone wondered, “What on earth is Barb building?” 

One of my neighbors said “Wow, it’s wonderful seeing a woman confident with power equipment!”   I just smiled because a power drill outfitted with a Phillips-head screwdriver bit hardly qualifies as major power equipment but I was proud of myself for building my own trellises and saving a ton of money over buying such substantial cedar trellises, and having them shipped to my home or renting a vehicle to get them from some garden boutique—even if it’s for the sake of 3 lovely clematis.

I laughed inside knowing that no one would know that I didn’t have to cut anything or touch my husband’s circular saw. Baby steps for Barbara, I guess.  With my ready-cut deck pieces and using deck screws into the reverse side, I was able to have secure construction and a pretty finished front surface. 

After constructing the wooden pieces, I decided to complete the ornamental look by staining the cedar to enhance the durability.  Using a natural wood stain, I applied two coats of stain on the next cooperative weather day (above 40 degrees).

Then, I hung my wall art on each trellis using deck screws and positioned the trellises behind these clematis that are just now beginning to leaf out.  I can’t wait to show you how pretty it all looks when my clematis bloom in the late spring/early summer.

****

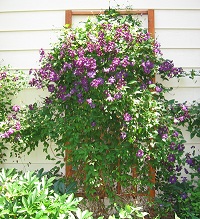
This is how it looks in full bloom.  The iron wall art is nearly hidden by the abundance of vining leaves and flowers.  In the winter, I cut the vines back so that the wall art shows for winter decoration.  With three trellises and clematis on each, the entire side of my garage is filled with blossoms.  A lovely season of year…

Continue Reading